Micro-computer tomography (microCT) is a powerful, non-destructive tomography technique that enables researchers to see the interior of objects at microscale. One area where it’s gaining traction is in the world of additive manufacturing.
While additive manufacturing has experienced rapid growth in recent years, the complex parts produced must be carefully designed, tested, and manufactured, and then inspected for quality control. With microCT, components are kept intact while examined, making it a desirable process for verifying the quality of parts in a variety of industries ranging from aerospace to automotive to medicine.
Using tools such as the Thermo Scientific HeliScan, engineers can scan large volumes of data in the regions they want to explore using a helical trajectory and iterative reconstruction technology. The process uses one continuous helical scan to avoid stitching together images, producing high-resolution 3D models of samples up to 200 millimeters wide.

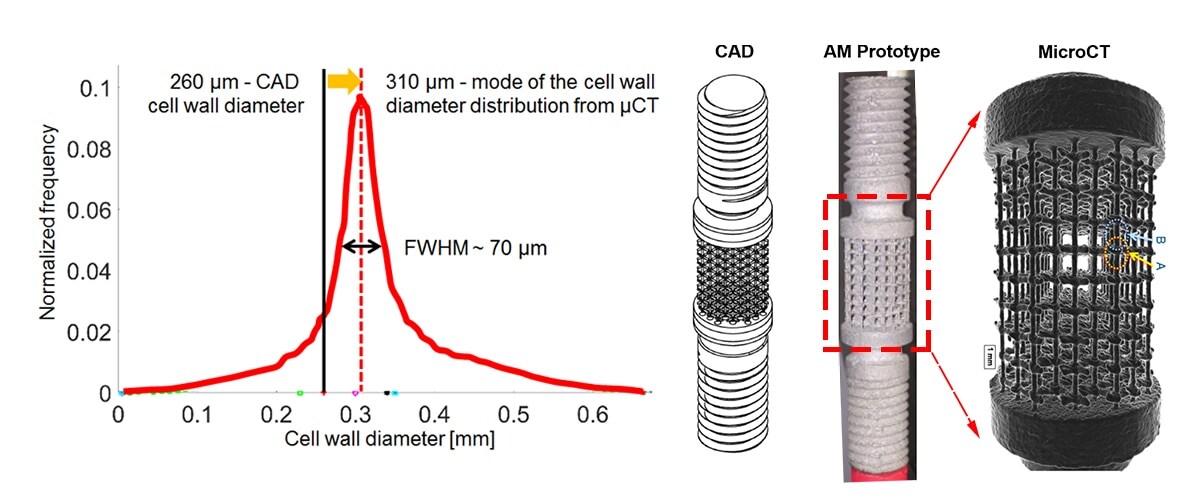
Using microCT, engineers identify non-uniformities in the diameter of the cell wall of a titanium scaffolding prototype created using additive manufacturing. The measurements do not match those indicated by the CAD drawing.
With microCT, engineers are able to discover defects in the internal structure of components produced through additive manufacturing at below 400 nanometer resolutions. By measuring the dimensions of complex parts down to the nanometer scale, for example, microCT can pinpoint internal surfaces, lattice parts and other areas of a component that haven’t been uniformly produced (see Figure 1).
MicroCT can also be used to visualize and quantify pores or voids created during the additive manufacturing process. By comparing different areas of a component, for example, engineers can ascertain whether the pores are unequally distributed on the top and bottom and use this information to strengthen the structure.

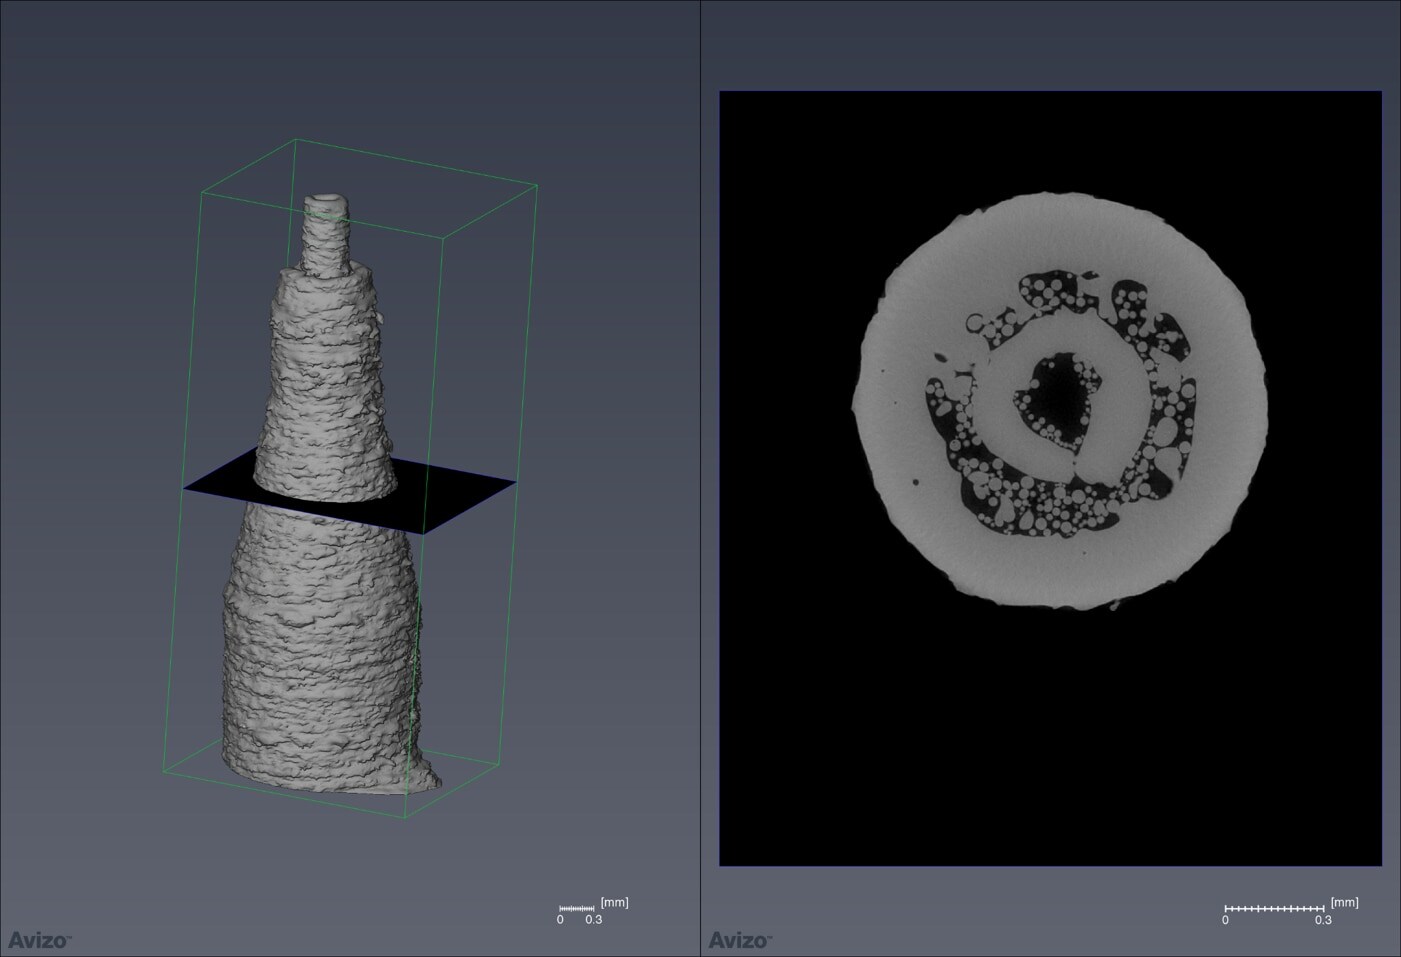
Using microCT in combination with Thermo Fisher Avizo software, engineers developed a high-resolution 3D model of a titanium nozzle used for gas-mixing injection. Examining a cross section of the rendering, they were able to identify defects such as broken inner-channel walls and surface roughness.
Using microCT, engineers can also uncover impurities in the 3D printing process such as broken interior walls caused by non-melted powder particles and surface roughness due to sintered powder particles (see Figure 2).
Oftentimes, HeliScan MicroCT is used as part of a multi-scale workflow in which engineers combine microCT with other techniques such as focused ion beam-scanning electron microscopes, scanning transmission electron microscopes to obtain information about an additive manufacturing component at different scales. Images from the various techniques can be correlated with the complementary information overlaid to obtain very detailed information.
Using microCT in additive manufacturing, engineers can dramatically improve their production processes. As more technicians integrate microCT into the additive manufacturing process, the technique will lead to stronger, more durable components that advance a wide range of industries.
Subscribe now to receive new Accelerating Microscopy posts straight to your inbox. For more information about Thermo Scientific microscopy instruments, visit thermofisher.com/em.
Dirk Laeveren is a product marketing manager at Thermo Fisher Scientific.
To learn more about microCT, fill out this form to speak with an expert.

Leave a Reply